Jump to section
Overview
This page has everything needed to rebuild the project from scratch: the physical prototype, the tests, the goal, the images, and this website.
All of it lives in one git repository:
wifflesoccer/
├── site/                 ← this website (Vite root)
│   ├── index.html        concept page
│   ├── docs.html         this page
│   ├── src/              styles.css, sim.js (kick simulator)
│   └── public/
│       ├── images/       AI-generated concept images (.webp)
│       └── renders/      3D renders (.png)
├── concept/              first-draft standalone pages + 3D render scene
│   └── renders/scene.html
├── docs/
│   ├── image-prompts.md  exact prompts for every AI image
│   ├── image-source/     original full-size AI images
│   └── deploy.md         hosting / deploy guide
├── cloudflare.config.ts  Cloudflare Workers config (cf CLI)
└── vite.config.ts        build config
1 · Garage prototype (Phase 0)
Shopping list
- 4–6 hollow plastic play balls, ~18–20 cm (the cheap thin ones sold in big mesh bags). Get one more than you plan to cut, as the control ball.
- Rotary tool (Dremel-type) with a small cutting/routing bit and a sanding drum, or a 12 mm step drill bit plus a hobby knife
- Masking tape, a fine marker, a flexible measuring tape, and a rubber band that fits around the ball
- Safety glasses and a dust mask. Plastic dust and chips fly.
- Kitchen scale (to log weights)
Steps
- Mark the equator. Stretch the rubber band around the widest part of the ball, then run masking tape along it. One side of the tape is the "holed half".
- Find the pole of the holed half: the point furthest from the tape everywhere. Mark it.
- Lay out the slots. Divide the circle around the pole into 8 equal directions (every 45°). On each line, mark a slot centred about halfway between the pole and the equator. For a 19 cm ball each slot is about 4 cm long × 1.2 cm wide, with its long side pointing at the pole. For other sizes, scale proportionally.
- Cut. Clamp the ball gently in a towel-lined bowl. Drill a hole at each end of the slot, then cut between them with the rotary tool. Work slowly: thin plastic melts and grabs at high speed.
- Round and smooth the ends. Sand every slot edge smooth. Rough edges and sharp corners are where cracks start.
- Colour the holed half with a marker or tape stripe so you can see which way the holes face when you kick.
- Weigh and label each ball (e.g. "A · 8 slots · 92 g").
Variations worth making: 6 short slots, 8 long slots, 10 round 12 mm holes. Keep one ball uncut as the control.
2 · Testing the curve
- Set up: put a target (a chair, bucket or cone) 7 m from a kick spot on a calm day. Lay a tape line across the ground at the target, with marks every 25 cm left and right.
- Film: phone on a tripod or a friend 2 m behind the kicker, at slow-motion (120 or 240 fps). Film every kick.
- Kick protocol: for each ball do 10 kicks with the holes facing left, 10 facing right, and 10 with the uncut control ball. Aim straight at the target. Use a flat, low-spin strike through the middle of the ball (a "knuckle" kick). Then repeat 5 kicks each with deliberate spin.
- Measure: for each kick, note where it crossed the tape line (cm left or right) and whether it cracked.
- Compare: average the sideways miss for each set. The holes matter if the "holes-left" and "holes-right" averages are clearly on opposite sides, and further apart than the control ball's spread.
ball, holes_facing, kick_no, miss_cm (− = left), spin (y/n), cracked (y/n), notes
A-8slot, left, 1, -42, n, n, late dip
A-8slot, right, 1, 35, n, n,
control, -, 1, -6, n, n,
3 · 3D-printed test balls (Phase 1)
Once Phase 0 shows an effect, switch to printed balls so every variant is identical and repeatable.
- Design: two hemispheres that join at the equator with a snap or twist-lock lip. One solid half, plus several interchangeable holed halves (6 / 8 / 10 slots, with and without raised rims). The CAD files haven't been made yet. That's the next build step.
- Material: TPU 95A (flexible filament). Wall ~1.0–1.2 mm, plus ~1 mm raised rim around each slot.
- Target weight: 110–150 g for a 19 cm ball. Weigh both halves together before testing.
- Printing tips: print each half dome-up, slow (20–30 mm/s), with dry filament. TPU strings if it's damp.
- Test: repeat the Section 2 protocol for each variant, then kick the best one 100 times to check durability.
4 · Building the goal (Phase 2)
A 2.4 × 1.2 m (8 × 4 ft) box goal from 1¼" PVC, with pool-noodle bumpers.
Parts
- 3–4 × 10 ft lengths of 1¼" PVC pipe (3 is exactly enough, so buy a spare for mistakes), cut to: 2 × 48" posts, 2 × 48" top-bar halves, 2 × 36" side bases, 2 × 48" back-base halves
- 6 × 1¼" 90° elbows (2 top corners, 2 post-to-base, 2 back corners) and 2 × 1¼" couplings (to join the 48" halves)
- 8 × 4 ft backyard goal net, plus zip ties or net clips
- 3–4 pool noodles (hollow, ~6 cm thick), duct tape or zip ties
Assembly
- Join the two top-bar halves with a coupling, and do the same for the back-base halves.
- Front frame: post, top elbow, top bar, top elbow, post.
- Push an elbow onto the bottom of each post pointing backwards, then fit a 36" side base into each.
- Close the back with elbows and the joined back base. Dry-fit first; glue only once you're happy, or leave it unglued so it packs down.
- Zip-tie the net from the top bar down to the back base.
- Slit pool noodles lengthwise, push them over the posts and top bar, and tape them closed. Those are your bumpers.
Rough cost: $60–100 depending on the net. Pop-up goals of the same size work too; just add the noodles.
5 · Where the numbers come from
- Wiffle-like weight (110–165 g): a real Wiffle ball is ~7.3 cm and ~21 g, about 0.2 m² of frontal area per kg. A 19 cm ball has 0.028 m² of frontal area, so the same ratio gives ~140 g. The range allows ±25%.
- Wall thickness: weight ≈ 4πr² × wall × density × 0.94 (6% removed for slots). At 19 cm and 130 g: TPU (1.2 g/cm³) ≈ 1.0 mm, polyethylene (0.92 g/cm³) ≈ 1.3 mm.
- "About a third of the kick force": the force needed to launch a ball scales with its mass for the same speed and contact time. 130 g ÷ 430 g ≈ 0.3.
- Kick simulator: 2D, top-down. Drag ∝ v², a side push from the holes ∝ v² whose direction wanders as the ball tumbles, and a spin term ∝ spin × v². Spin reduces the hole effect. Coefficients are guesses; replace them with Phase 0/1 measurements. Source:
site/src/sim.js. - Costs and timelines are rough estimates, not quotes.
- Unknown: which way the ball breaks relative to the holes when kicked (the simulator assumes toward the smooth side), and whether a flexible shell keeps the effect.
6 · Recreating the 3D renders
The three renders (renders/ball.png, goal.png, kit.png) are real-time 3D scenes made with three.js and screenshotted with headless Chrome. They're accurate to the dimensions, unlike AI images.
- The scene is one file:
concept/renders/scene.html.?scene=ball|goal|kitpicks the shot. The slot pattern is computed per pixel on the sphere (count, length, width, rims are parameters inballTextures()). - Render each scene with Chrome (needs internet to load three.js from a CDN):
cd concept/renders CH="/Applications/Google Chrome.app/Contents/MacOS/Google Chrome" for s in ball goal kit; do "$CH" --headless=new --use-angle=swiftshader --enable-unsafe-swiftshader \ --hide-scrollbars --window-size=1400,900 --virtual-time-budget=20000 \ --screenshot="$PWD/$s.png" "file://$PWD/scene.html?scene=$s" done - Headless Chrome leaves a black strip at the bottom. Crop it:
python3 - <<'EOF' from PIL import Image for n in ['ball','goal','kit']: im = Image.open(f'{n}.png').convert('RGB'); px = im.load(); y = im.height - 1 while y > 0 and max(px[im.width//2, y]) <= 8 and max(px[10, y]) <= 8: y -= 1 im.crop((0, 0, im.width, y + 1)).save(f'{n}.png') EOF - Copy them into the site:
cp concept/renders/*.png site/public/renders/
7 · Recreating the AI images
The photo-style images are concept art made with ChatGPT's image model (run through the Codex CLI's built-in image generation). They show the idea, not a real product. Check proportions against the 3D renders.
How the images were made
- Every prompt has two parts: the same product spec paragraph (so the ball looks identical in every image), followed by a scene description.
- The 3D renders from Section 6 were attached as reference images for shape and colour.
- Each result was checked against the spec (colours, slots only on the orange half, no text or logos, correct hands and feet) and regenerated if wrong. Only the kick shot needed a second try.
- The originals (1536 × 1024 PNG) are kept in
docs/image-source/and compressed to WebP for the site with the script below.
To regenerate
Easiest (ChatGPT web/app): start a new chat, attach the reference render(s) listed for the image, paste the shared spec plus that image's scene text, and ask for a 3:2 landscape image. From the terminal: in a Codex CLI session with image generation enabled, give it the same prompt and the reference image paths. There is no seed, so every run gives a slightly different picture. Pick the best one.
Shared product spec (used in every prompt)
Product specification: a backyard-play soccer ball, diameter 19 cm, hollow and lightweight (approximately 130 g), flexible TPU plastic with a slightly glossy satin finish. Exactly one hemisphere is vivid orange (#ff5a1f), with exactly eight oblong through-slots with rounded ends and a slightly raised molded rim/bead around each opening. The eight slots form one evenly spaced ring around that hemisphere's pole, with each slot's long axis pointing radially toward that pole. Dark empty hollow interior is visible through the openings. The opposite hemisphere is solid off-white (#f0ede4), with faint embossed soccer-panel seam lines and absolutely no holes. A thin dark charcoal joining band encircles the equator. Keep this design consistent. No text, lettering, logos, branding, trademarks, watermarks or labels anywhere in the image. Reference renders are geometry/color guidance only; ignore and remove all lettering visible in them, and use the stated saturated orange instead of the reference's washed-out lighting. Produce a photorealistic photograph, not a 3D render. Landscape 1536 x 1024, 3:2 aspect ratio.
The six images
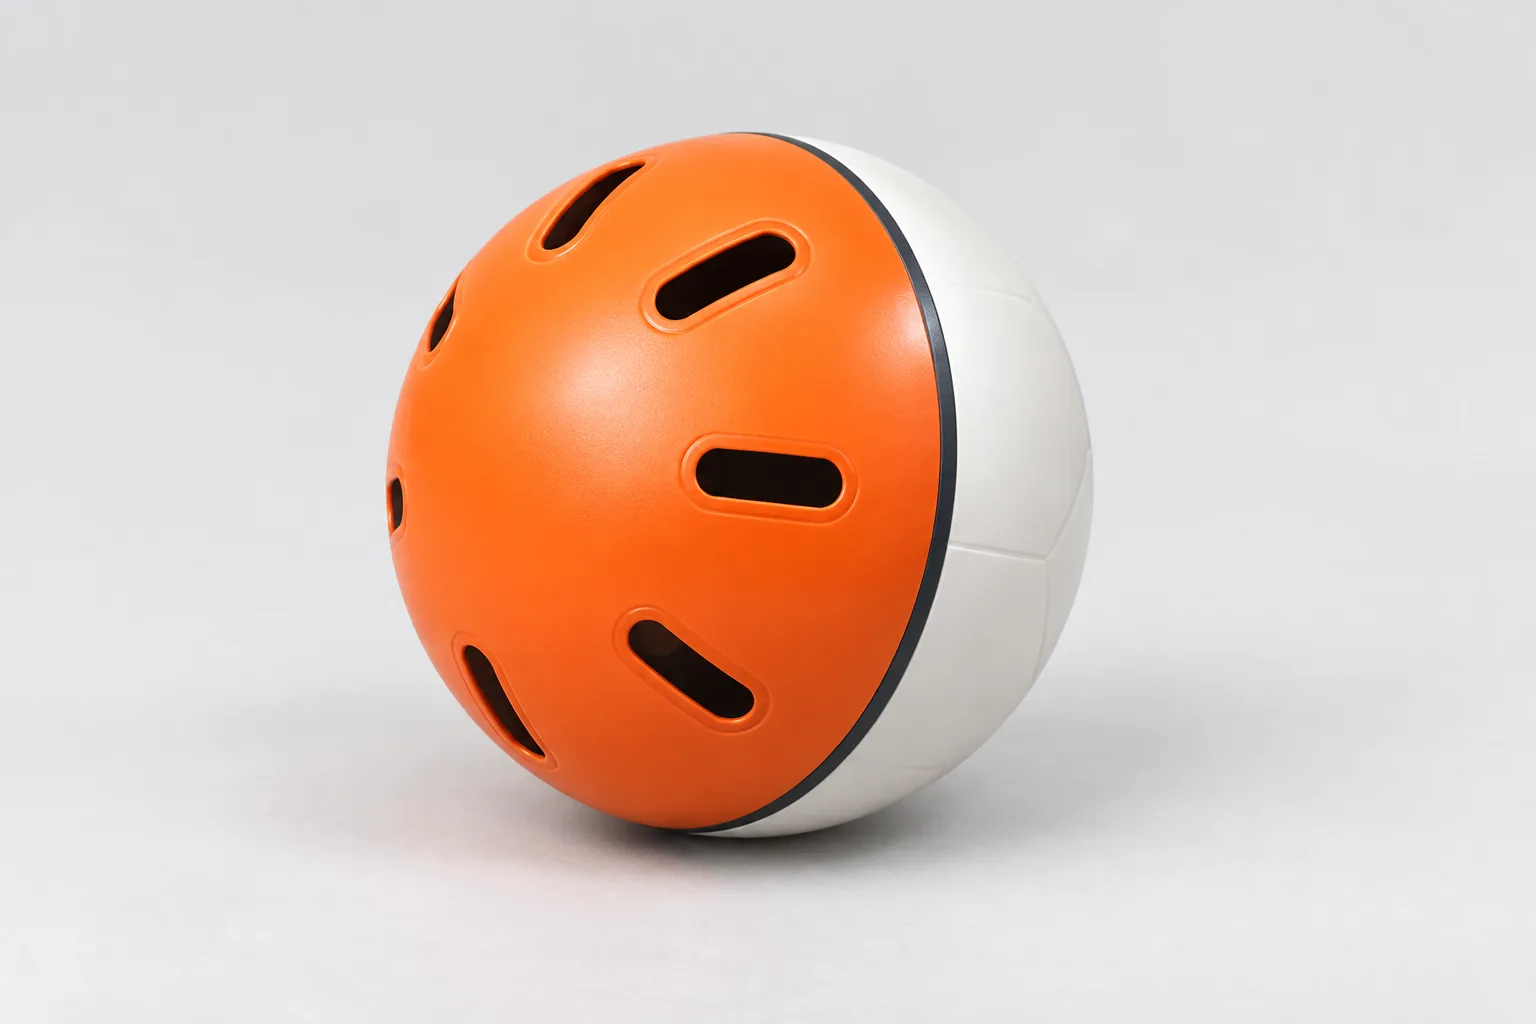
hero-ball.webp
Attempts: 1 · References: concept/renders/ball.png
Watch for: Watch orange-only radial slot placement and faint white panel seams; far-side slots are occluded.
Full prompt
Use case: product-mockup. Asset: product preview website hero-ball. Reference image 1 is geometry and color guidance for the ball, not an edit target.
[shared product spec ↑]
Scene: one single ball on a seamless light-grey studio sweep. Three-quarter view, camera slightly above the ball, orange hemisphere facing front-left and solid white hemisphere clearly visible on the right, with the thin charcoal equator line between them. Show the radial slot arrangement accurately, allowing normal occlusion of far-side slots. The ball occupies about 60% of image height, centered with generous breathing room. Soft diffused studio illumination, realistic delicate satin highlights, soft contact shadow. Crisp professional product photography. Only one ball and nothing else.
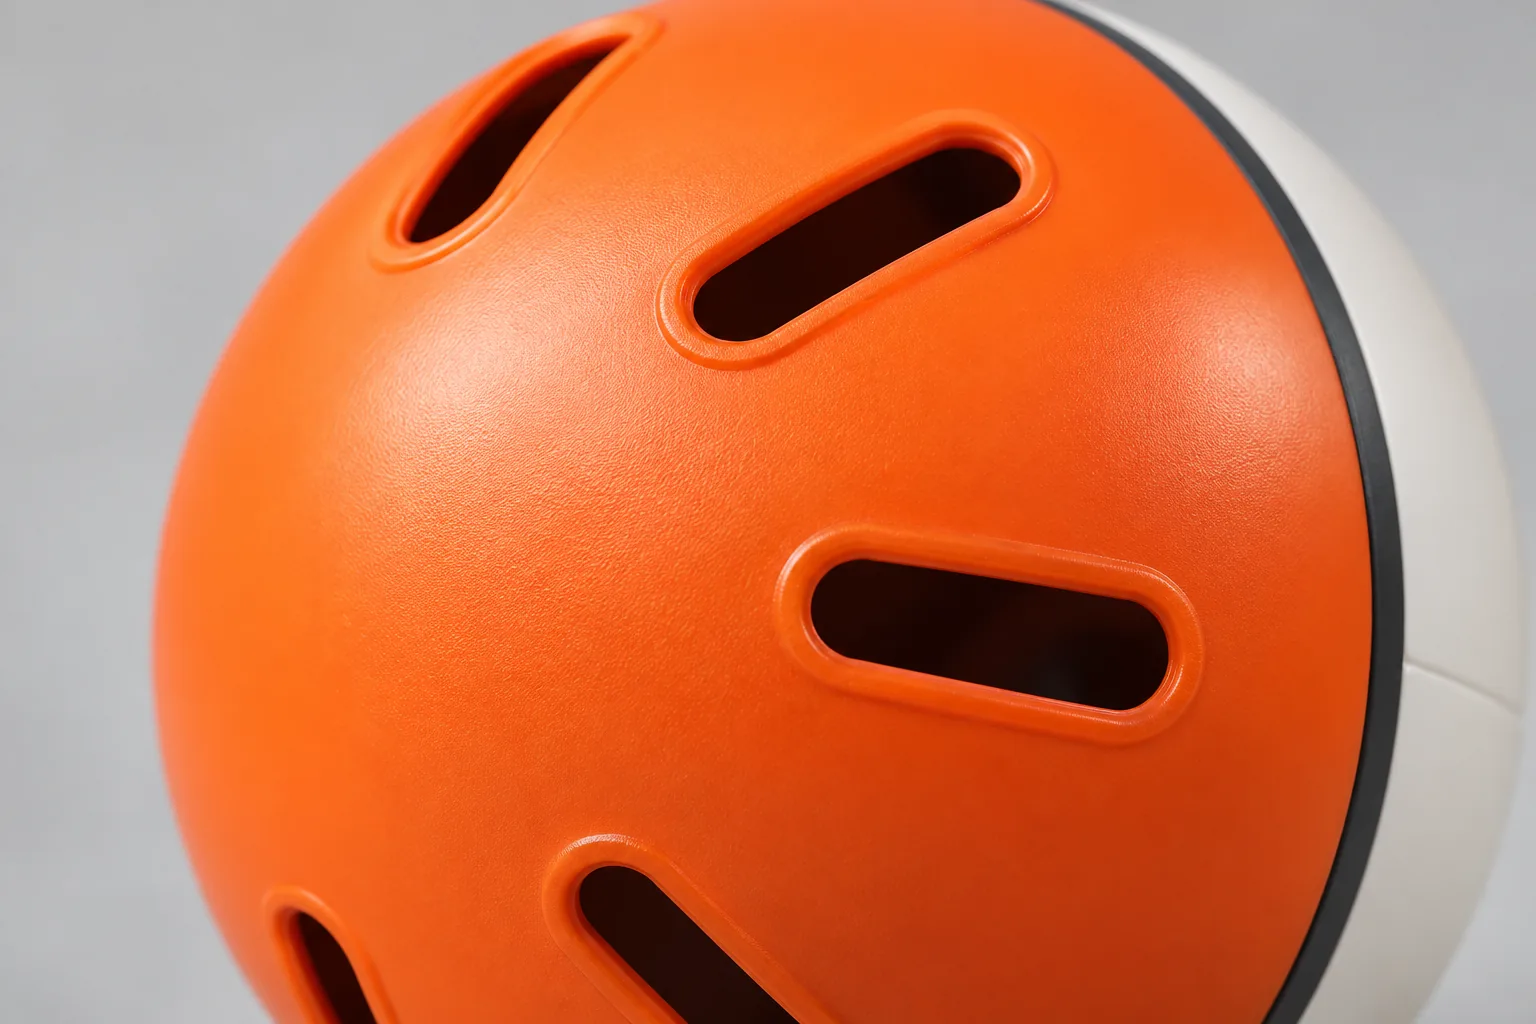
ball-detail.webp
Attempts: 1 · References: concept/renders/ball.png
Watch for: Watch raised rounded rims, dark hollow interiors and consistent satin texture; macro framing hides part of the ring.
Full prompt
Use case: product-mockup. Asset: product preview website ball-detail. Reference image 1 is geometry and color guidance for the ball.
[shared product spec ↑]
Scene: extreme macro photograph of the curved orange slotted hemisphere. Tight three-quarter crop with three or four of the eight radial slots clearly visible and additional slots naturally out of frame. Emphasize the oblong openings' smoothly rounded ends, slightly raised orange molded rim/bead, realistic satin TPU microtexture, thin flexible shell wall and dark hollow interior. A narrow edge of the solid off-white half and charcoal equator may appear at the right edge for continuity, with no openings on white. Soft directional studio light and shallow depth of field, sharp nearest rims, seamless neutral grey background. Do not show a flat panel, mesh, perforations, circular holes or multiple rings of slots.
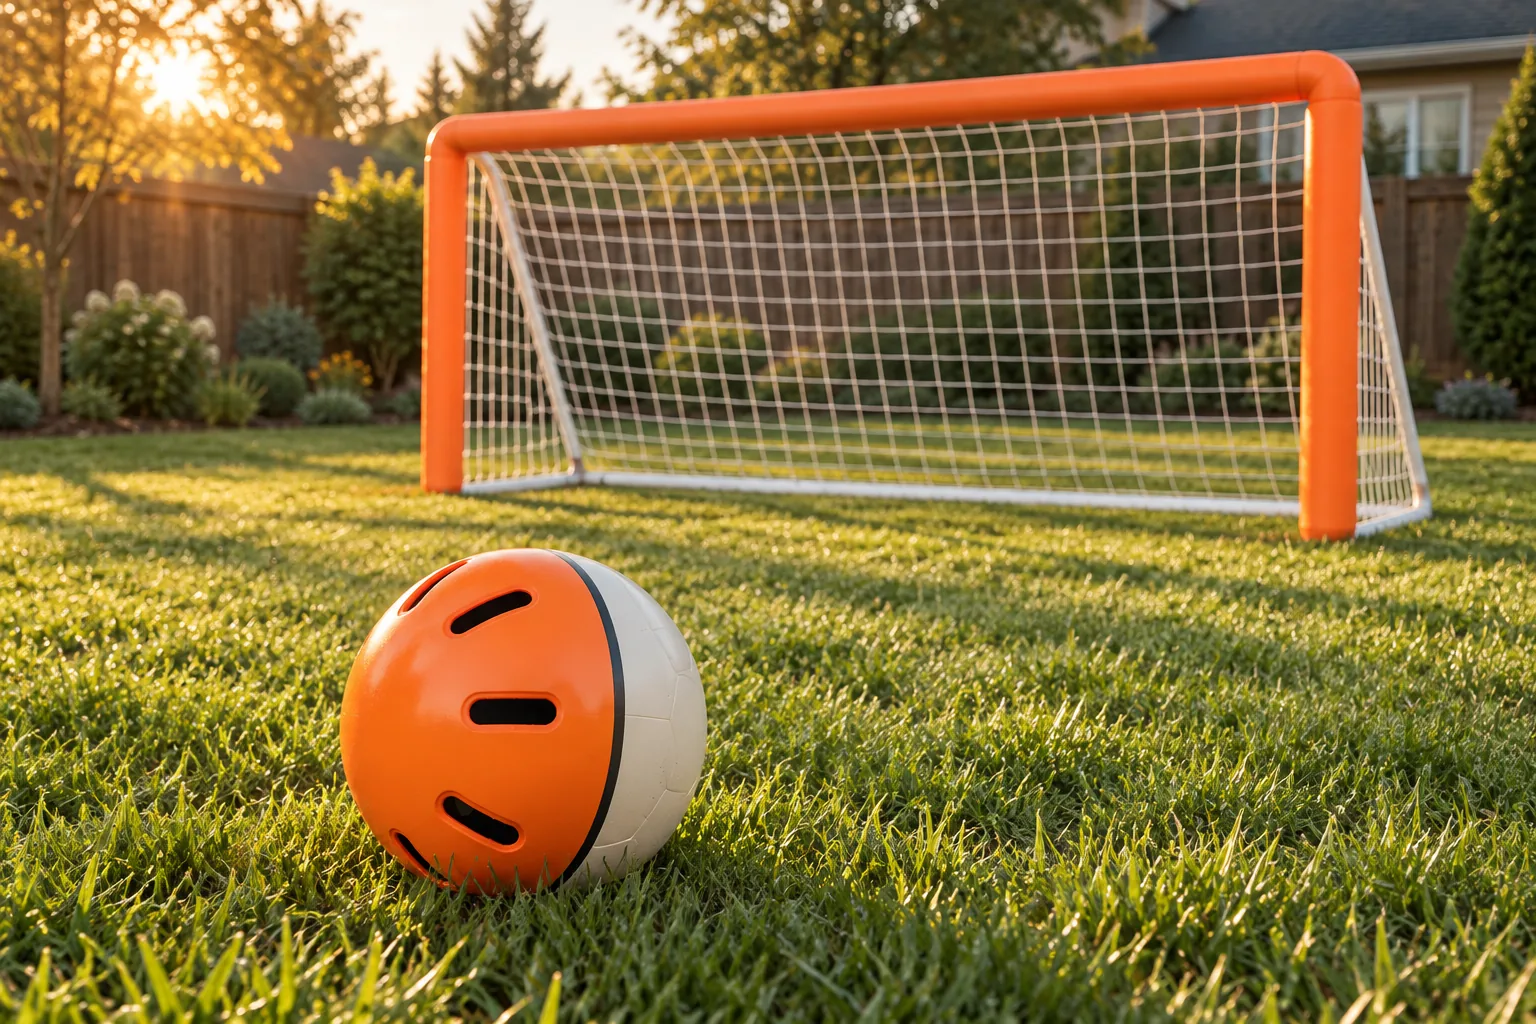
goal-backyard.webp
Attempts: 1 · References: concept/renders/ball.png, concept/renders/goal.png
Watch for: Watch continuous orange foam on both posts/crossbar and the goal's 2:1 proportions; foreground perspective enlarges the ball.
Full prompt
Use case: photorealistic-natural. Asset: product preview website goal-backyard. Reference image 1 guides the ball geometry; reference image 2 guides the goal geometry.
[shared product spec ↑]
Scene: suburban backyard lawn at golden hour, wood fence, discreet shrubs and softly blurred home in the background. One backyard pop-up soccer goal, precisely proportioned 2.4 m wide and 1.2 m tall (2:1 opening aspect ratio), white structural frame with white net. Thick rounded vivid ORANGE foam bumper padding wraps the entirety of BOTH upright posts AND the full top crossbar, continuous padding around rounded top corners; rear braces and ground supports remain white. Goal sits realistically on grass, viewed slightly off-axis so the net depth is visible. One matching orange-and-off-white ball rests on grass in front of the goal, foreground large enough to identify orange-only oblong rimmed slots, white solid half, charcoal equator. Warm sun, natural grass textures and shadows. No people, text, markings, branding, drawn arrows or extra balls.
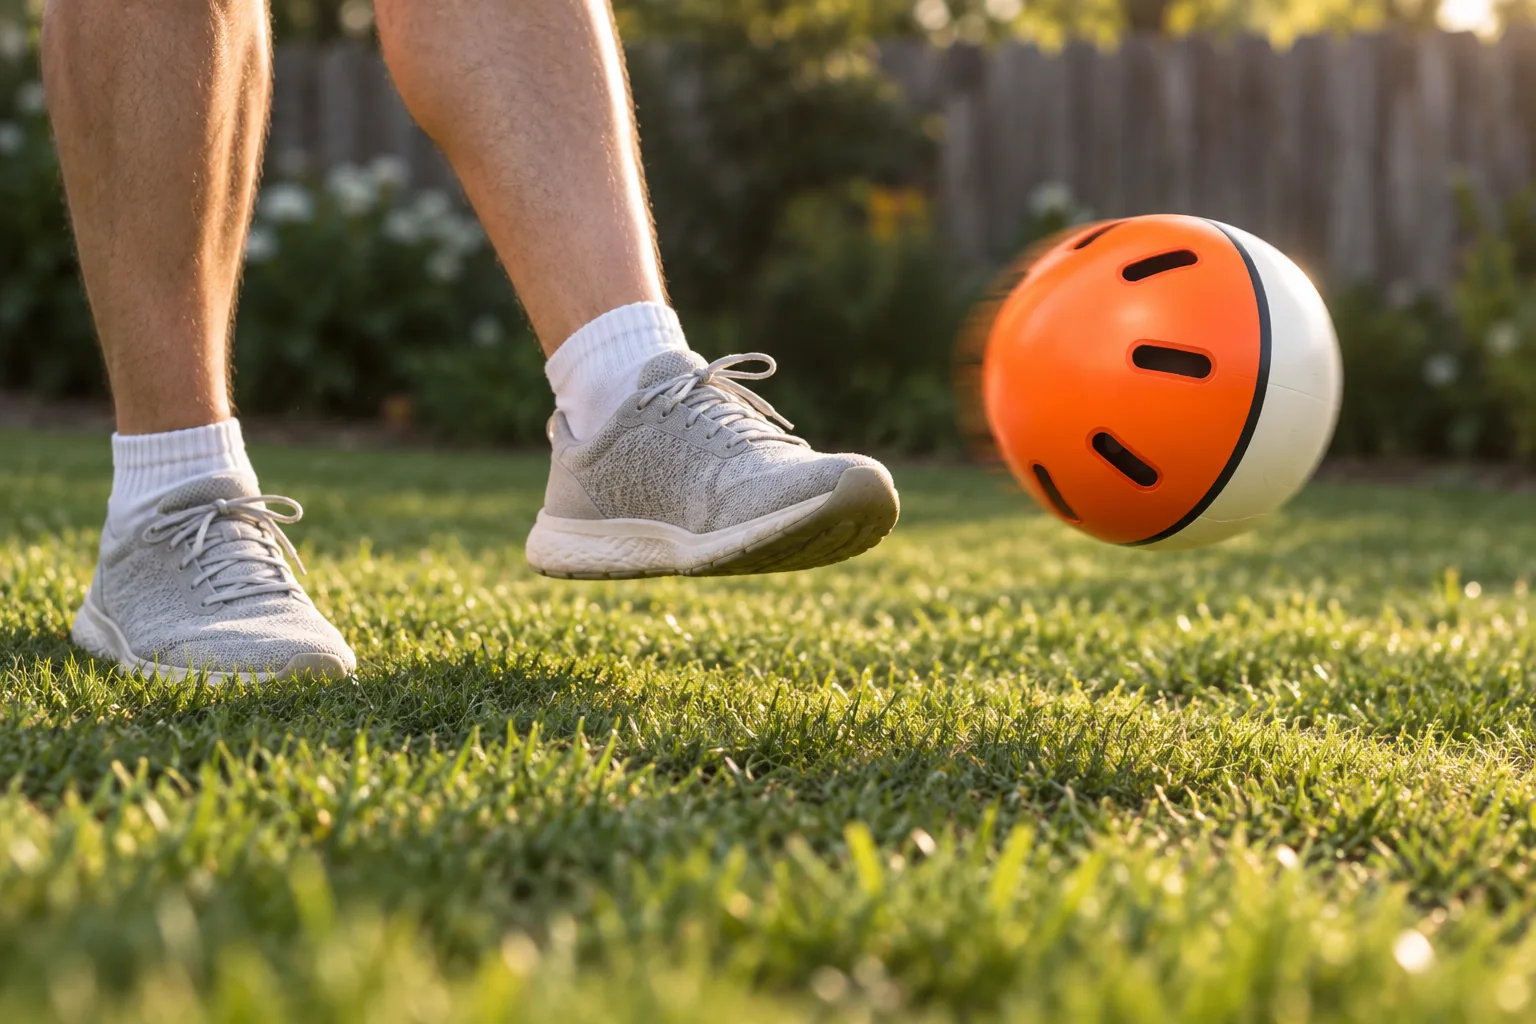
action-kick.webp
Attempts: 2 · References: concept/renders/ball.png
Watch for: Watch the below-knee crop, two feet only, unbranded shoes, recognizable ball and subtle motion blur; curvature is suggested rather than diagrammed.
Full prompt
Use case: photorealistic-natural. Asset: product preview website action-kick. Reference image 1 guides the ball geometry.
[shared product spec ↑]
Scene: backyard lawn, low camera at shin height. A single anonymous adult is shown ONLY from knees down, exactly two legs and two feet in plain unbranded neutral trainers and simple socks. One foot planted naturally on grass and the other just completing an inside-of-foot kick. The matching orange-and-off-white slotted ball is already airborne just beyond the kicking foot, roughly 20–30 cm above the grass. Show its satin shell, orange-only radial rimmed slots, solid white half and charcoal equator. Slight photographic directional motion blur around the spinning ball's contour and a dynamic sideward kicking pose suggest a curving flight. Keep enough surface sharpness to recognize the design. Natural late-afternoon light, shallow depth of field, fence and greenery blurred behind. No faces, upper bodies, recognizable identity, brands, logos, text, arrows, artificial trajectory trails, duplicated ball, extra limbs or feet.
Framing correction: the top edge of the photograph MUST cut through the legs immediately BELOW the knees. Show calves, ankles, socks and shoes only. Neither kneecaps, thighs nor shorts may appear anywhere. Keep both leg crops entering from the top-left edge; use a wider horizontal composition with the feet and airborne ball at grass level. The ball should sit just 20–30 cm above grass, not waist-high.
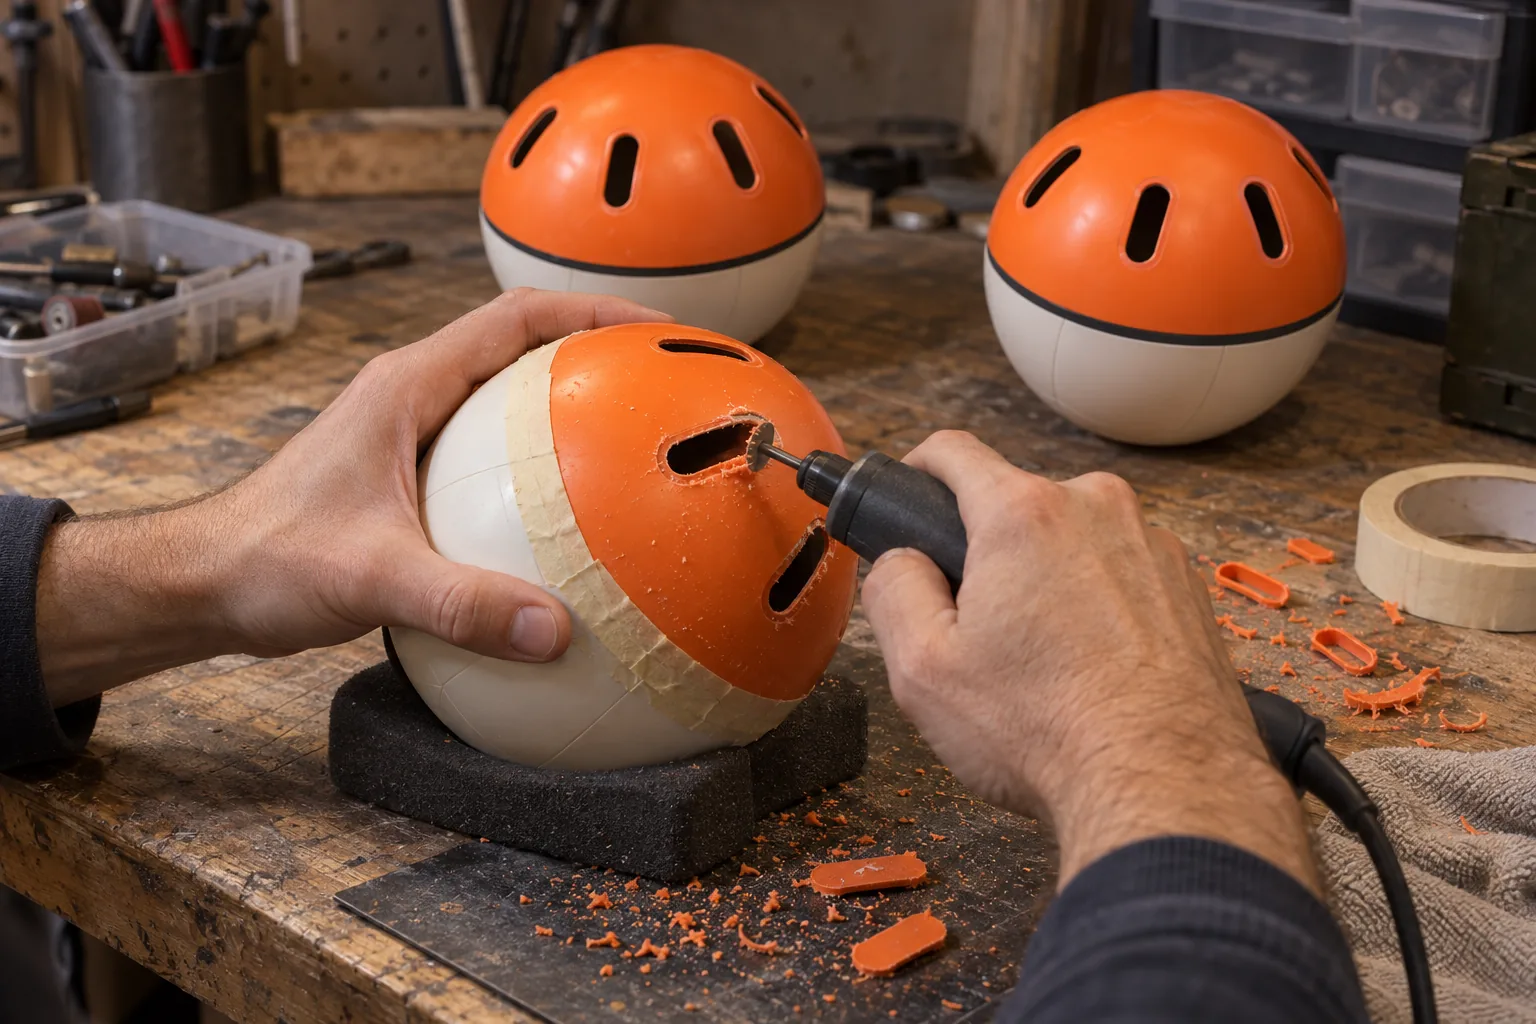
phase0-garage.webp
Attempts: 1 · References: concept/renders/ball.png, concept/renders/kit.png
Watch for: Watch natural two-hand anatomy and hand-cut slots confined to orange; unfinished prototype edges intentionally lack production finish.
Full prompt
Use case: photorealistic-natural. Asset: product preview website phase0-garage. Reference image 1 guides assembled ball geometry; reference image 2 guides hemisphere geometry.
[shared product spec ↑]
Scene: realistic hands-on early garage prototype workbench. Only two anatomically correct adult hands are visible, no face or other limbs: one securely holds a cheap 19 cm hollow plastic play ball on a padded support, the other operates a small unbranded rotary cutting tool with a tiny cutting bit, cutting an oblong slot into the orange hemisphere. Pale masking tape marks and protects the orange side of the equatorial boundary without covering the active slot area. Off-white hemisphere stays completely solid. The active prototype shows a few slots already cut and one in progress; its edges look hand-cut rather than injection molded. Two finished hacked orange/off-white balls sit nearby with one radial ring of eight rounded oblong slots on orange only, dark hollow interiors, thin charcoal equator; modest handmade rim finishing. Worn wooden bench, a few cutting offcuts, subdued garage background, realistic warm task light. Tool housing completely plain, no labels. No text, lettering, diagrams, logos or watermarks anywhere, no sparks or smoke, no extra fingers or hands. Documentary product-development photograph.
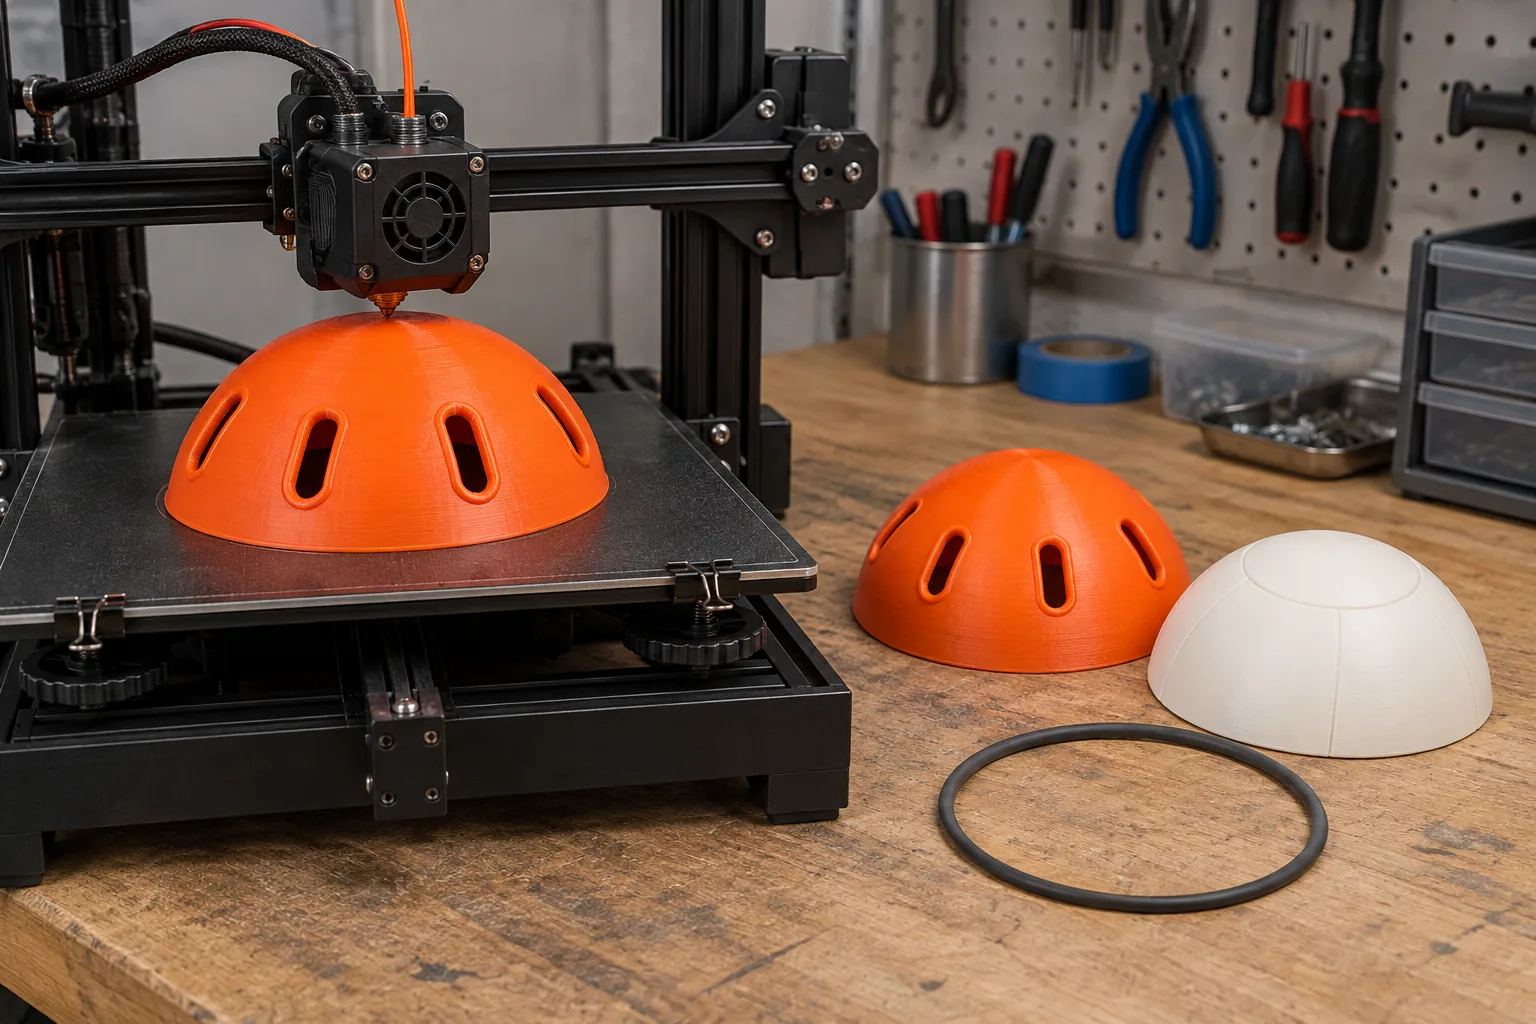
phase1-print.webp
Attempts: 1 · References: concept/renders/kit.png, concept/renders/ball.png
Watch for: Watch eight-slot radial hemisphere geometry, layer texture, solid white half and plausible printing; nozzle is depositing the dome's final top layers.
Full prompt
Use case: photorealistic-natural. Asset: product preview website phase1-print. Reference image 1 guides separate hemisphere geometry; reference image 2 guides the complete ball.
[shared product spec ↑]
Scene: an unbranded desktop FDM 3D printer on a garage workbench actively printing a vivid orange flexible TPU hollow hemisphere, the exact half of the specified 19 cm ball. Print is oriented open equatorial rim DOWN on the build plate, convex dome UP. Nozzle close above the partially completed dome; sidewalls already reveal rounded-end oblong slots spaced radially in one ring with raised rim beads. Clearly visible subtle FDM layer texture, plausible printer hardware and orange filament. On the bench beside the printer, one finished orange slotted hemispherical shell (convex up, eight radially oriented rounded slots with raised rims) and one matching solid off-white hemispherical shell with faint embossed soccer-panel lines and NO holes, plus a thin charcoal joining ring, neatly arranged. Reference assembly parts should look like half-spheres, not full balls, bowls with flat lids or perforated cages. Real workshop photography, soft task light, neutral background. No people, printer brands, logos, text, screens with writing, watermarks or labels.
Compress for the web
from pathlib import Path
from PIL import Image, ImageOps

for source in sorted(Path("docs/image-source").glob("*.png")):
    destination = Path("site/public/images") / (source.stem + ".webp")
    with Image.open(source) as original:
        image = ImageOps.exif_transpose(original).convert("RGB")
        image.thumbnail((1600, 1600), Image.Resampling.LANCZOS)
        quality = 82
        while True:
            image.save(destination, "WEBP", quality=quality, method=6)
            if destination.stat().st_size < 400_000:
                break
            if quality > 70:
                quality -= 2
            else:
                image.thumbnail(
                    (int(image.width * 0.9), int(image.height * 0.9)),
                    Image.Resampling.LANCZOS,
                )
        print(f"{destination}: {image.size}, quality={quality}, "
              f"{destination.stat().st_size} bytes")
The full log, with every exact prompt, is in docs/image-prompts.md in the repo.
8 · Rebuilding & deploying this site
This site is plain HTML, CSS and a little JavaScript, built with Vite and hosted on Cloudflare Workers (static assets, no server code), with the custom domain wifflesoccer.kamaalworks.com.
One-time setup
nvm install 24 && nvm use 24     # Node.js 24
npm i -g cf && cf auth login       # Cloudflare CLI, opens a browser to sign in
git clone <repo> && cd wifflesoccer
npm install
Everyday loop
- Edit pages in
site/(each top-levelsite/*.htmlbecomes a page). Put images insite/public/. - Preview locally:
npm run dev, then openhttp://127.0.0.1:5173. - Check without publishing:
npm run check && npm run deploy:dry-run - Publish:
npm run deploy. This rebuilds and uploads, and Cloudflare handles DNS and HTTPS for the custom domain.
Undo or take down
- Roll back:
cf workers deployments list --worker wifflesoccer-previewto find the previous version, then point 100% of traffic at it (exact command indocs/deploy.md). Or check out the old commit and deploy again. - Remove the site:
cf workers delete wifflesoccer-preview(try--dry-runfirst).
The full guide, with the hostname checks and why the build config looks the way it does, is in docs/deploy.md in the repo. The site is marked noindex, so search engines won't list it.